@Published public var channels = LazyCachedMapCollection<ChatChannel>()Custom Channel List
There are different variations on how to present a list of channels. Our ChatChannelListView component provides a lot of customization options to support those variations.
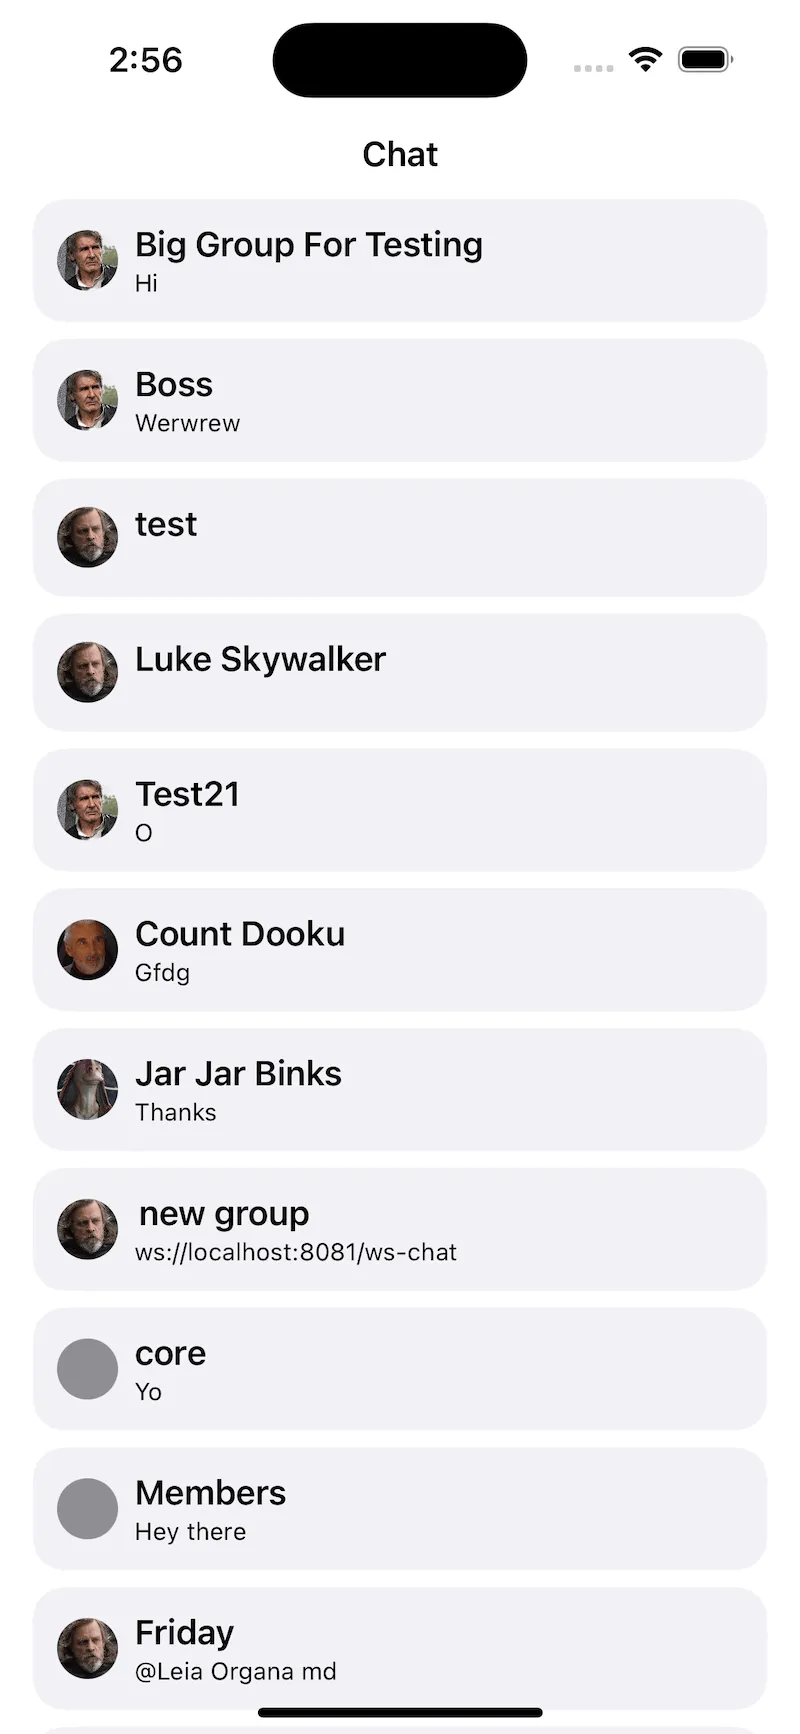
However, in some cases, you would need to build a completely custom UI. In this cookbook, we will build a simple channel list view, without using our UI components, only the low-level client state.

Channels State
We will expose the channels state with a view model, for example CustomChannelListViewModel. The view model will be an observable object, and it will implement the ChatChannelListControllerDelegate.
We will keep the channels as a published variable in the view model.
The ChatChannelListControllerDelegate has a method called controller:didChangeChannels, that sends updates when the channels are updated.
public func controller(
    _ controller: ChatChannelListController,
    didChangeChannels changes: [ListChange<ChatChannel>]
) {
    channels = controller.channels
}
In order to support pagination, we will use the ChatChannelListController’s method loadNextChannels. We can call this method when the channel list items appear on the screen.
public func checkForChannels(index: Int) {
    if index < (controller?.channels.count ?? 0) - 15 {
        return
    }

    if !loadingNextChannels {
        loadingNextChannels = true
        controller?.loadNextChannels(limit: 30) { [weak self] _ in
            guard let self = self else { return }
            self.loadingNextChannels = false
        }
    }
}
Those are the most important bits for fetching and listening to the channels data. For reference, here’s the full implementation of the view model.
import StreamChat
import StreamChatSwiftUI
import SwiftUI

class CustomChannelListViewModel: ObservableObject, ChatChannelListControllerDelegate {

    @Injected(\.chatClient) var chatClient

    @Published public var channels = LazyCachedMapCollection<ChatChannel>()

    public private(set) var loadingNextChannels: Bool = false

    private var controller: ChatChannelListController?
    private var timer: Timer?

    init() {
        setupChannelListController()
    }

    public func controller(
        _ controller: ChatChannelListController,
        didChangeChannels changes: [ListChange<ChatChannel>]
    ) {
        channels = controller.channels
    }

    public func checkForChannels(index: Int) {
        if index < (controller?.channels.count ?? 0) - 15 {
            return
        }

        if !loadingNextChannels {
            loadingNextChannels = true
            controller?.loadNextChannels(limit: 30) { [weak self] _ in
                guard let self = self else { return }
                self.loadingNextChannels = false
            }
        }
    }

    func imageURL(for channel: ChatChannel) -> URL? {
        channel.lastActiveMembers.first(where: { member in
            member.id != chatClient.currentUserId
        })?.imageURL
    }

    //MARK: - private

    private func updateChannels() {
        channels = controller?.channels ?? LazyCachedMapCollection<ChatChannel>()
    }

    private func setupChannelListController() {
        guard let currentUserId = chatClient.currentUserId else {
            observeClientIdChange()
            return
        }
        controller = chatClient.channelListController(
            query: .init(filter: .containMembers(userIds: [currentUserId]))
        )

        controller?.delegate = self

        updateChannels()

        controller?.synchronize { [weak self] error in
            guard let self = self else { return }
            if error != nil {
                print("handle error here")
            } else {
                self.updateChannels()
            }
        }
    }

    private func observeClientIdChange() {
        timer?.invalidate()
        timer = Timer.scheduledTimer(withTimeInterval: 1.0, repeats: true, block: { [weak self] _ in
            guard let self = self else { return }
            if self.chatClient.currentUserId != nil {
                self.timer?.invalidate()
                self.timer = nil
                self.setupChannelListController()
            }
        })
    }
}
Channel List View
Next, let’s implement the channel list view. We will call it CustomChannelListView.
Since the list of channels is exposed via a view model, you can easily build any UI you prefer with SwiftUI. Our implementation is a pretty simple one.
Here’s the code.
import StreamChat
import StreamChatSwiftUI
import SwiftUI

struct CustomChannelListView: View {

    @Injected(\.chatClient) var chatClient

    @StateObject var viewModel = CustomChannelListViewModel()

    var body: some View {
        NavigationStack {
            ScrollView {
                LazyVStack {
                    ForEach(viewModel.channels) { channel in
                        NavigationLink {
                            ChatChannelView(
                                channelController: chatClient.channelController(for: channel.cid)
                            )
                        } label: {
                            HStack {
                                if let imageURL = viewModel.imageURL(for: channel) {
                                    StreamLazyImage(url: imageURL)
                                } else {
                                    Circle()
                                        .fill(Color.gray)
                                        .frame(width: 30)
                                }
                                VStack(alignment: .leading) {
                                    Text(DefaultChatChannelNamer()(channel, chatClient.currentUserId) ?? "")
                                        .lineLimit(1)
                                        .bold()
                                    Text("\(channel.previewMessage?.text ?? "No messages")")
                                        .font(.caption)
                                }
                                Spacer()
                            }
                            .padding(.all, 12)
                            .foregroundColor(.primary)
                            .background(Color(uiColor: .secondarySystemBackground))
                            .cornerRadius(16)
                            .padding(.horizontal)
                        }
                        .onAppear {
                            if let index = viewModel.channels.firstIndex(where: { chatChannel in
                                chatChannel.id == channel.id
                            }) {
                                viewModel.checkForChannels(index: index)
                            }
                        }
                    }
                }
            }
            .navigationTitle("Chat")
            .navigationBarTitleDisplayMode(.inline)
        }
    }
}
The most interesting part here is the navigation. On tap of a channel item, we want to show the selected channel.
For this reason, we are using a NavigationLink. Its destination is a ChatChannelView, which is the default channel view component from the SDK. However, you can also implement your own implementation here.
For loading new channels, we rely on the onAppear modifier on each channel list item. Whenever a new entry appears on screen, we find its index and check if we should load more channels by calling the view model’s checkForChannels method.
With that, you can use the custom channel list anywhere in your code.
    var body: some Scene {
        WindowGroup {
            CustomChannelListView()
        }
    }
Make sure that you have previously created and connected the StreamChat client, as described in the getting started section.
Summary
In this cookbook, you learnt how to implement a completely custom channel list view. For customizations of the existing component, please check the following page.
You can learn more about the channel list state exposed by the low-level client here.
As a next step, you can also explore other parts of our cookbook, where we build many interesting customizations. Furthermore, for a complete social experience, we recommend looking into our Video SDK.