

Wonder how apps keep users engaged with real-time in-app notifications? In-app notifications are a powerful tool for user retention and engagement. They keep users informed about important updates or activities, encourage users to return to the app regularly, and personalize the user experience based on individual preferences and behavior.
However, implementing an effective in-app notification system comes with challenges. How do you handle the technical aspects of real-time updates without negatively impacting app performance? How do you ensure notifications are timely and relevant to the user?
This tutorial provides a straightforward approach to creating an in-app notification system that keeps users engaged in real-time.
Demo
Before jumping into the technical stuff, let me give you a sneak peek of what you will build in this tutorial.
Prerequisites
You will need the following to get going with the implementation:
- Node.js 18 or later
- A Stream account
- A Vercel Account
Setting Up A New Stream Application
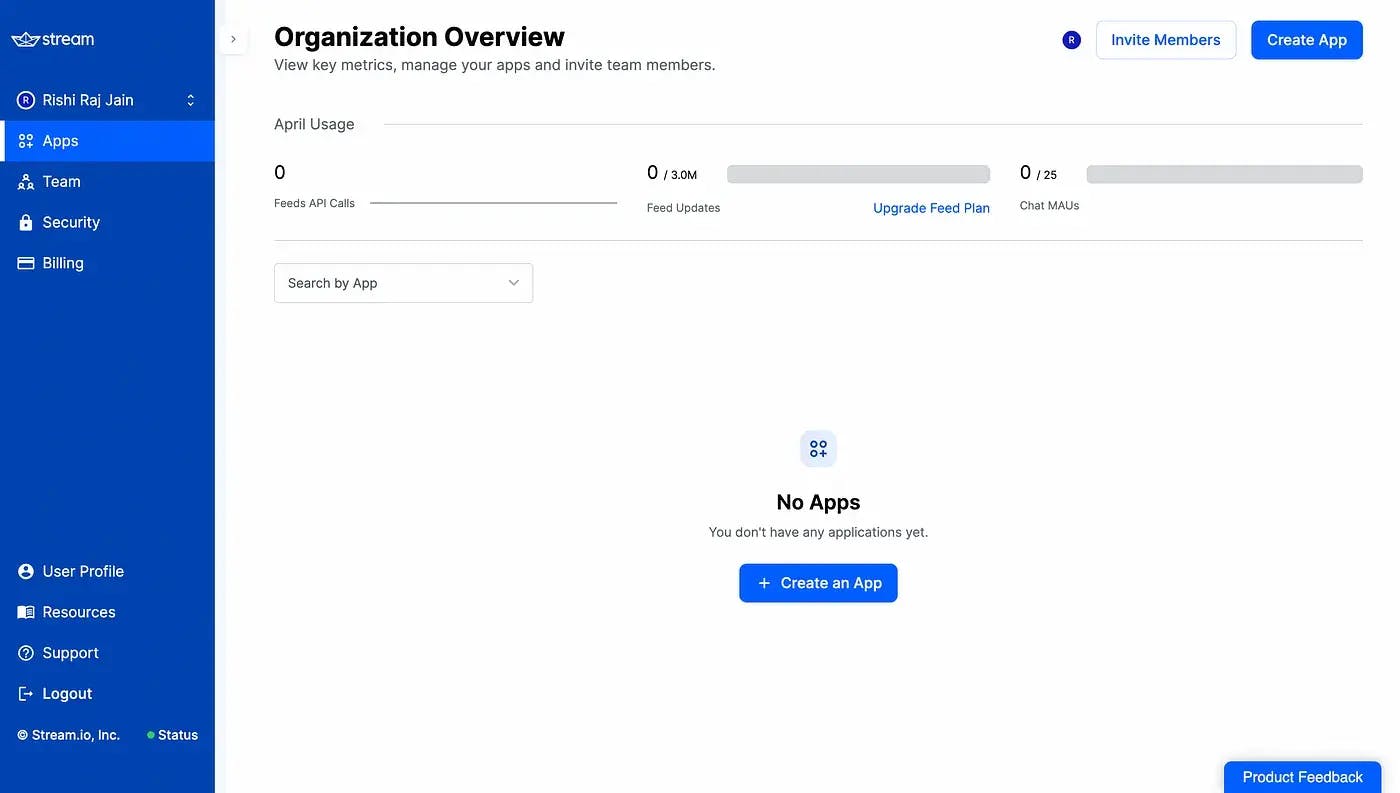
In this section, you will learn how to create a Stream application and activity feed groups. Once you have created a Stream account and are logged in, click on + Create an App to create a Stream chat application.
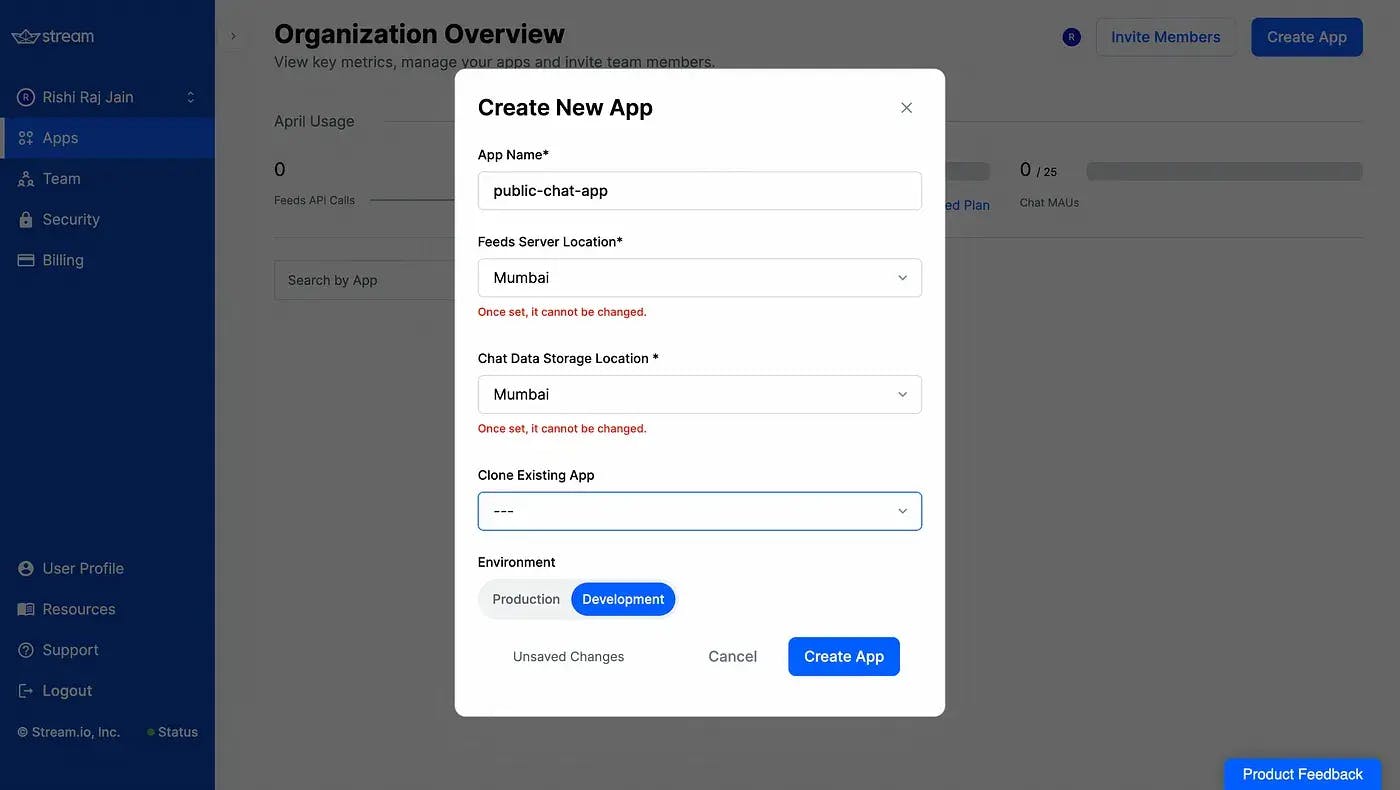
Enter an application name of your choice. Further, select the Chat Storage Location near to your website deployment region/function. I am in India, so I have set it to Mumbai.
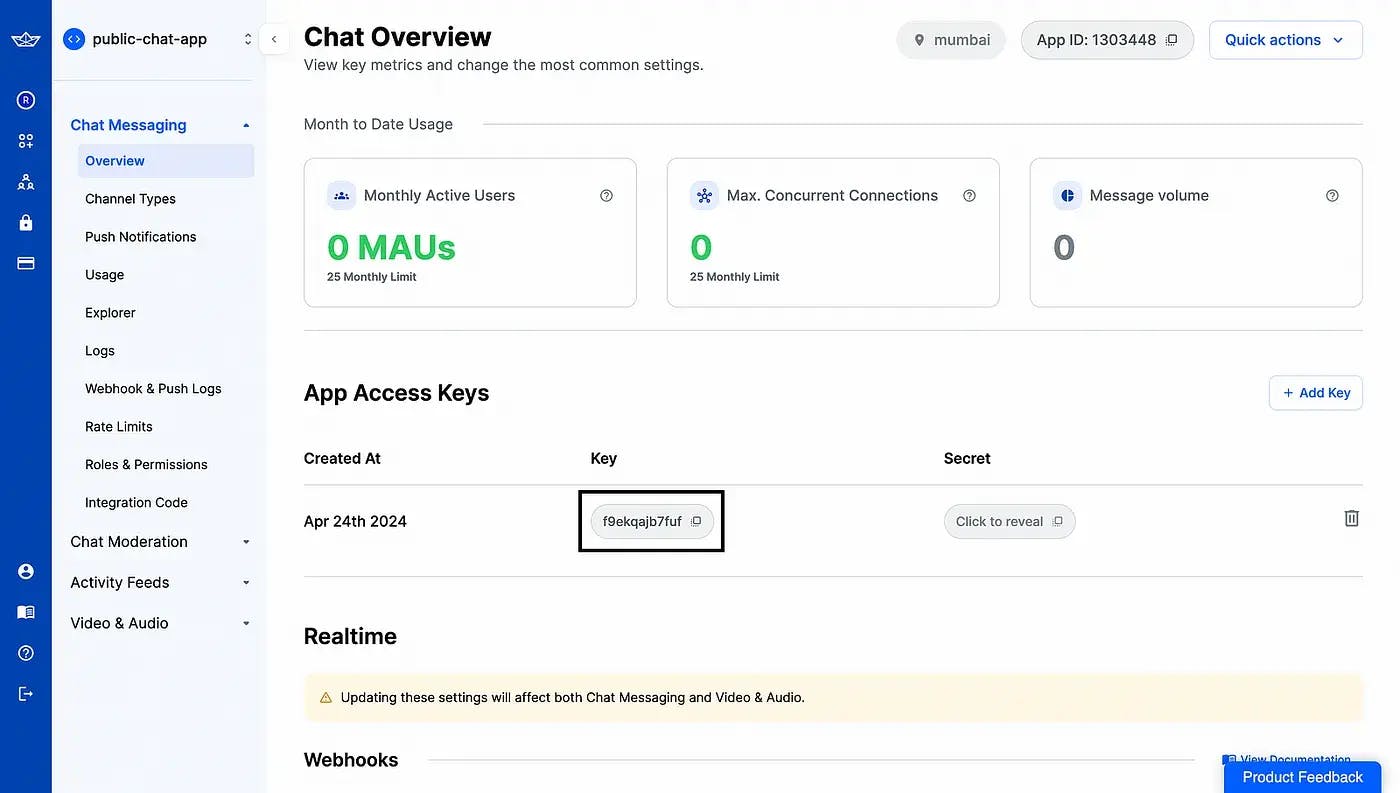
Once done, you will be taken to the Chat Overview screen. Copy the Key, Secret, and App ID to be used further in your Next.js application as NEXT_PUBLIC_STREAM_API_KEY, STREAM_API_SECRET, and NEXT_PUBLIC_STREAM_APP_ID respectively.
To allow users to follow each other, and be notified about their recent activities, you will want to create Stream's Flat Feed Groups. To get started, expand the Activity Feeds, and click Feed Groups.
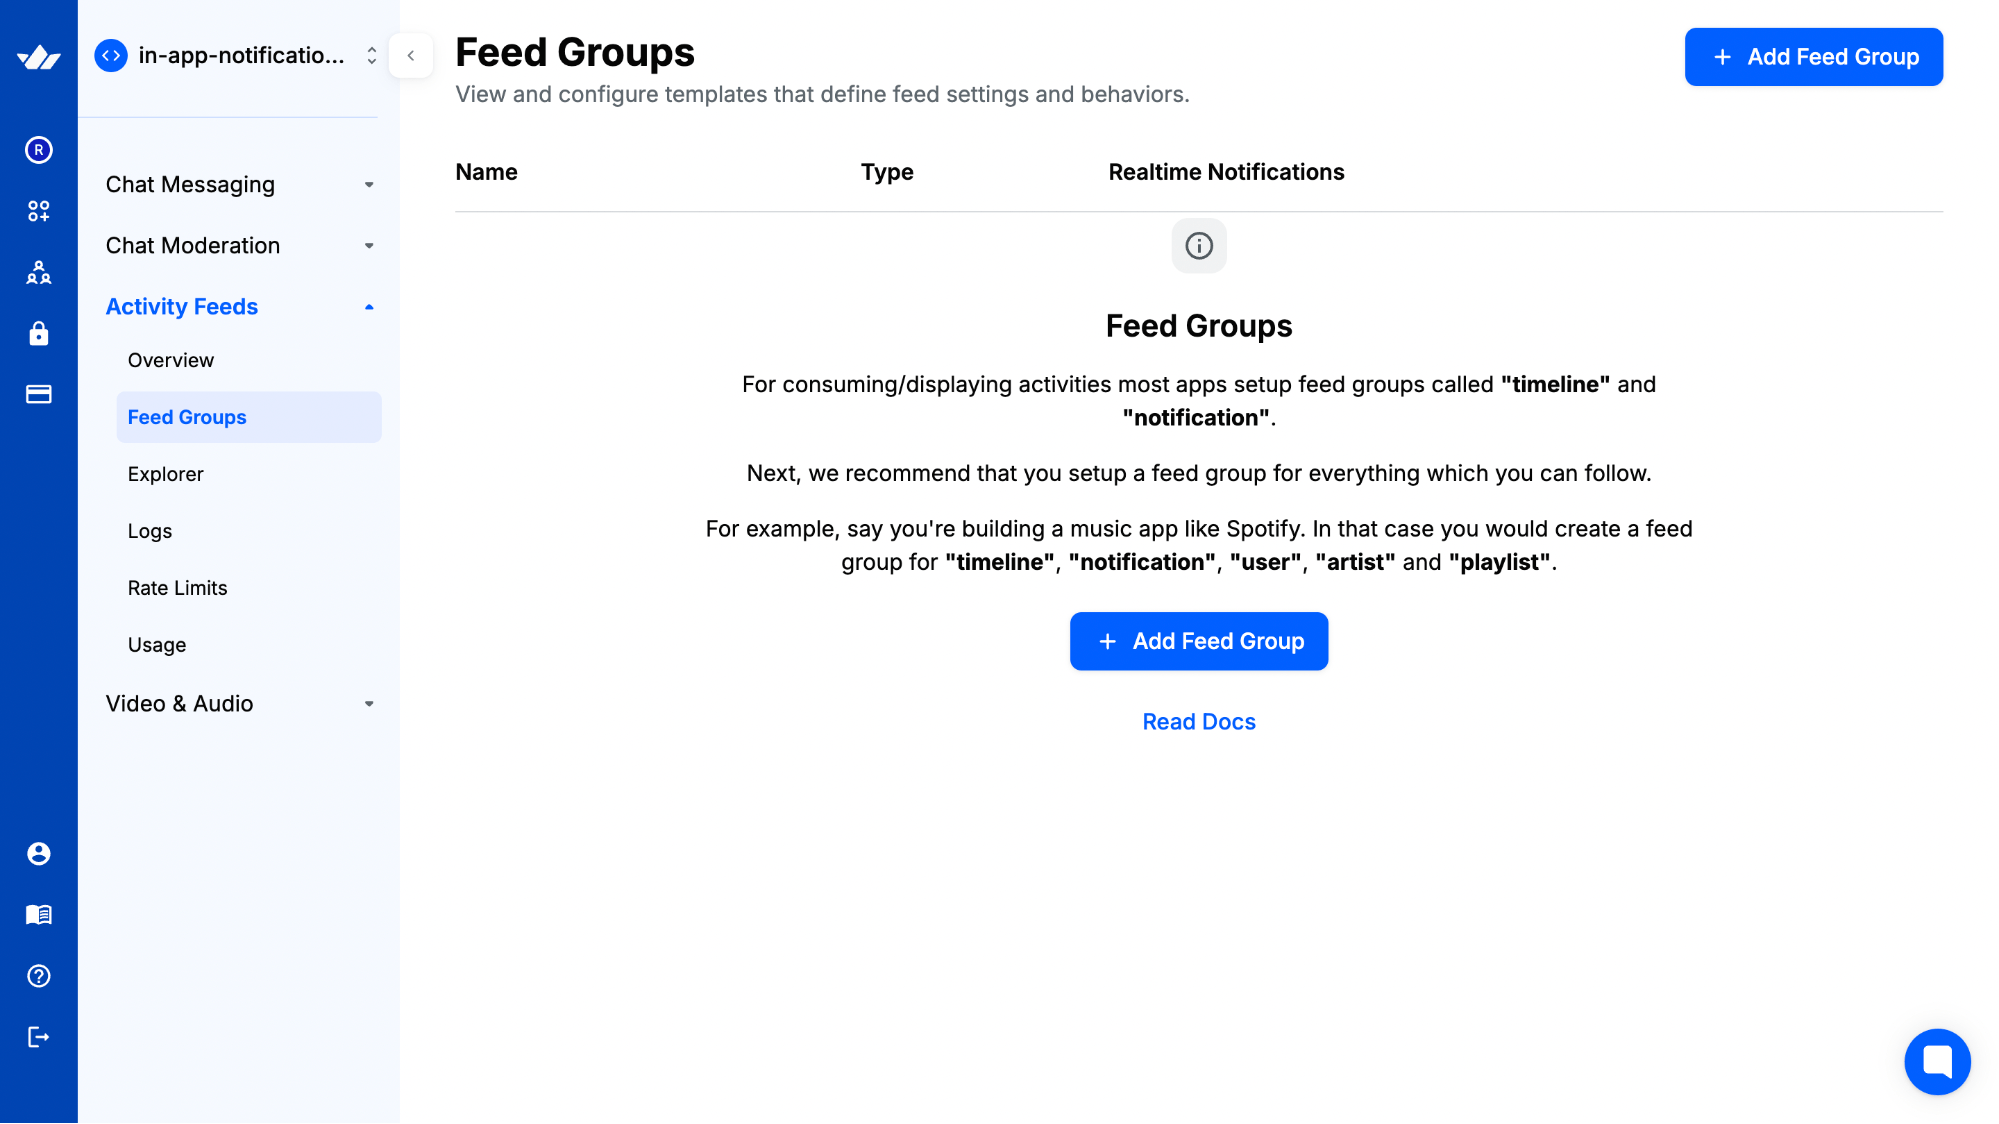
Click on + Add Feed Group button to start creating a feed group. To create a user feed group, enter the feed name as user, and enable realtime notifications so that you can reflect the activities in front-end reactively. Choose a Flat feed type since you want to only follow the activities of other accounts aka the "timeline".
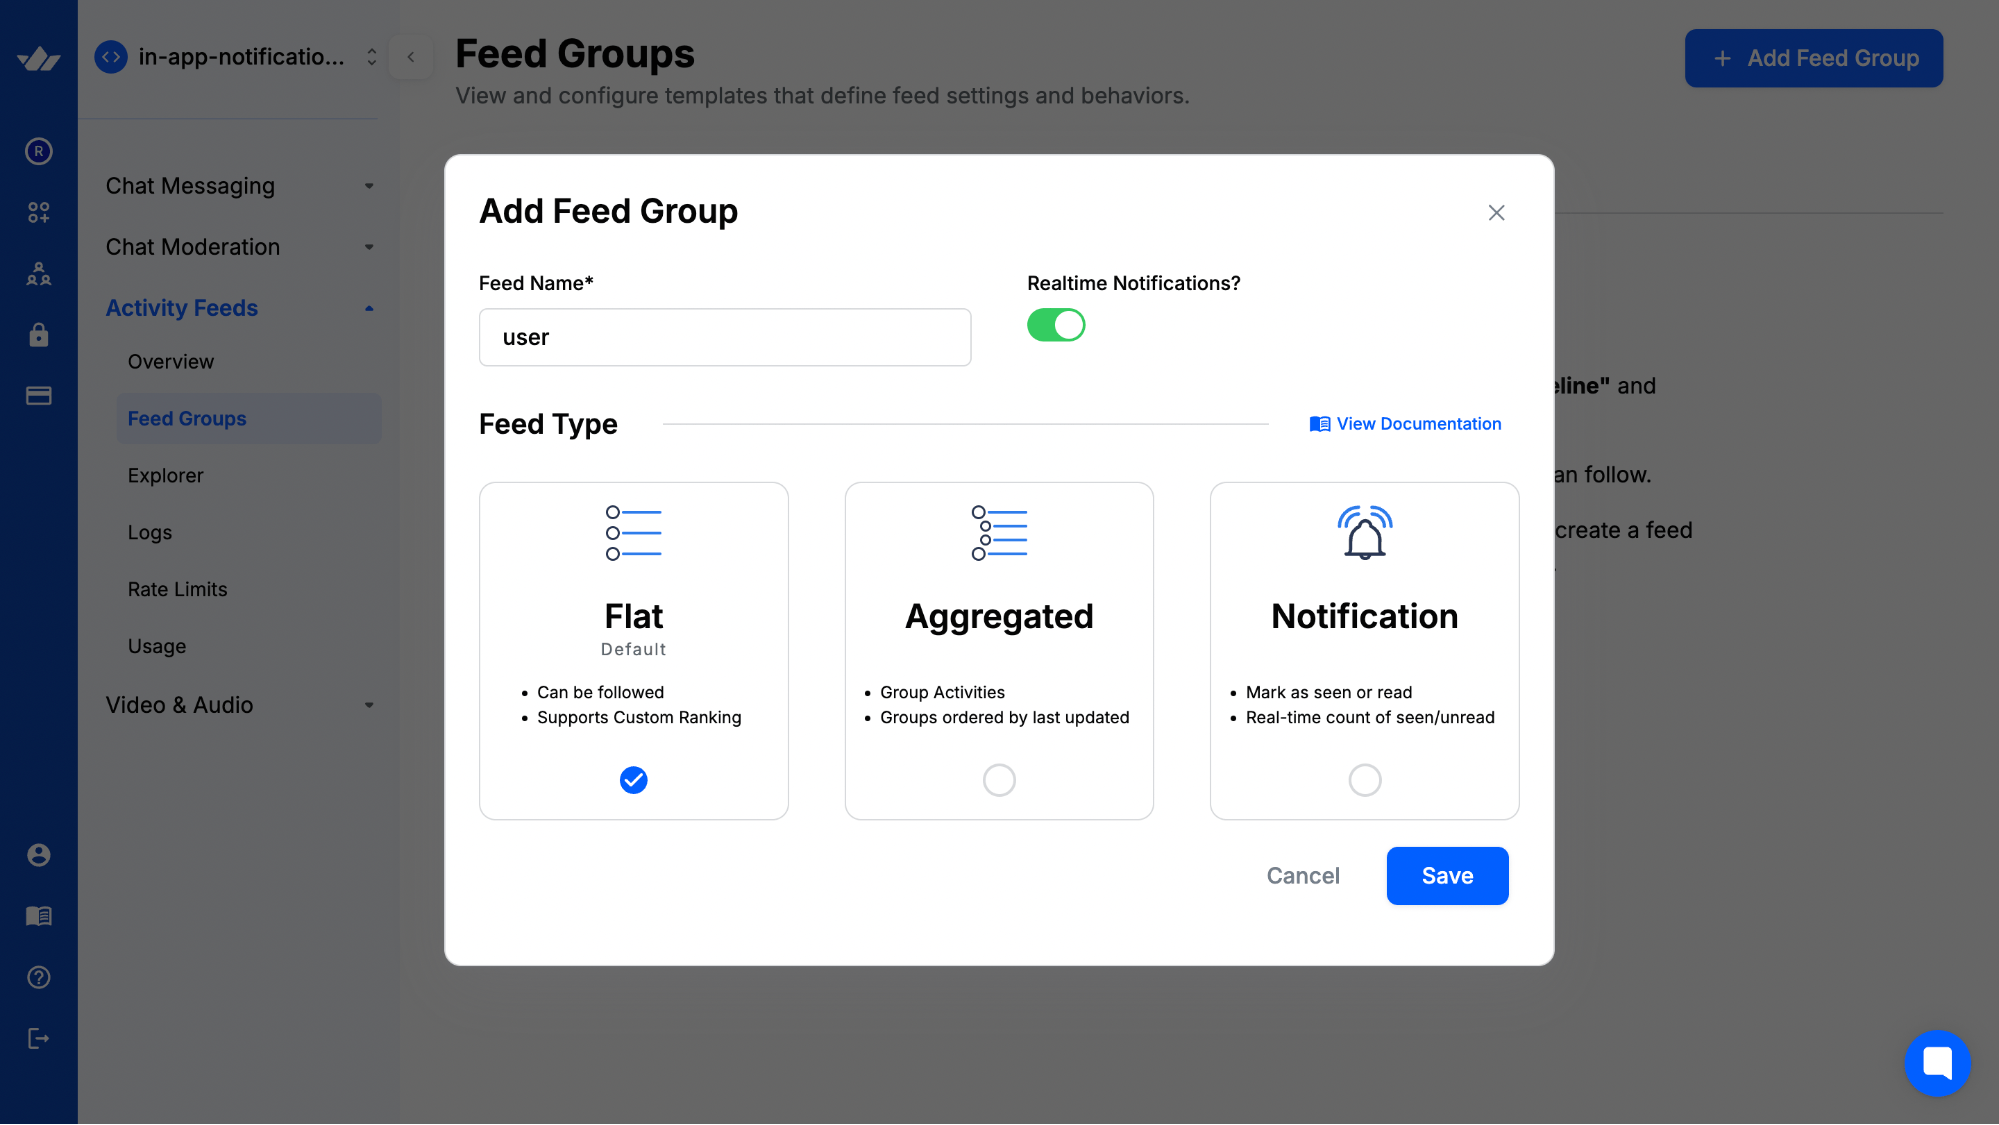
Finally, click Save to sync the changes. Similarly, create a feed group named timeline that will be used to track and post activities from a user.
You are now done with configuring the scope of what a user can observe. Now, let’s build the user interface for in-app notifications in Next.js.
Setting up a new Next.js application
In this section, you will learn how to create a new Next.js application, set up shadcn/ui in it, and figure out the requirements of your application to install relevant libraries for a quick implementation.
Let’s get started by creating a new Next.js project. Execute the following command:
1npx create-next-app@latest my-notifications-app
When prompted, choose:
Yeswhen prompted to use TypeScript.Nowhen prompted to use ESLint.Yeswhen prompted to use Tailwind CSS.Nowhen prompted to use src/ directory.Yeswhen prompted to use App Router.Nowhen prompted to customize the default import alias (@/*).
Once that is done, move into the project directory and start the app in development mode by executing the following command:
12cd in-notifications-app
npm run dev
The app should be running on localhost:3000.
Now, create a .env file at the root of your project. You are going to add the values obtained from the instructions earlier.
It should look something like this:
# .env

# Stream Environment Variables
STREAM_API_SECRET="..."
NEXT_PUBLIC_STREAM_APP_ID="..."
NEXT_PUBLIC_STREAM_API_KEY="..."
Now, execute the command below to install the Stream's dependencies:
1npm install getstream
The command installs the following library:
getstream: JavaScript API client to build scalable newsfeeds and activity streams.
Now, let's move on to integrating shadcn/ui components in the Next.js application.
Integrating shadcn/ui components
To prototype the notifications user interface quickly, you will set up the shadcn/ui with Next.js. shadcn/ui is a collection of beautifully designed components that you can copy and paste into your applications. Execute the command below to set up shadcn/ui:
npx shadcn-ui@latest initYou will be asked a few questions to configure a components.json, choose the following:
Yeswhen prompted to use TypeScript.Defaultwhen prompted to select the style to use.Slatewhen prompted to choose the base color.yeswhen prompted to use CSS variables for colors.
Once that is done, you have set up a CLI that allows us to add React components to your Next.js application easily. Execute the following command to get the button and input elements:
12npx shadcn-ui@latest add button
npx shadcn-ui@latest add input
Once that is done, you would now see a ui directory inside the app/components directory containing button.tsx and input.tsx files.
Generate Dynamic User Tokens with Stream
Create a file named route.ts in the app/api/token directory with the following code:
12345678910111213141516171819export const dynamic = 'force-dynamic'

export const fetchCache = 'force-no-store'

import { connect } from 'getstream'
import { NextResponse } from 'next/server'

if (!process.env.NEXT_PUBLIC_STREAM_API_KEY) throw new Error(`NEXT_PUBLIC_STREAM_API_KEY environment variable is not defined.`)
if (!process.env.STREAM_API_SECRET) throw new Error(`STREAM_API_SECRET environment variable is not defined.`)

const client = connect(process.env.NEXT_PUBLIC_STREAM_API_KEY, process.env.STREAM_API_SECRET)

export async function GET(request: Request) {
  const searchParams = new URL(request.url).searchParams
  const name = searchParams.get('name')
  if (!name) return new Response(null, { status: 400 })
  const userToken = client.createUserToken(name)
  return NextResponse.json({ userToken })
}
The code above uses Next.js's dynamic and fetchCache constants to force the route to be dynamic and disable caching. The connect function establishes a connection to the GetStream API using environment variables for the API key and secret. It then exports a GET request handler that:
- Extracts a name parameter from the request's query params.
- If the name is missing, it returns a
400 Bad Requestresponse. - If the name is present, it creates a user token using the GetStream client, and returns it in the response as JSON.
Building the In-App Notifications Interface with Next.js and Stream
In this section, you will build an in-app notifications interface that post, and display the activities of the accounts a user is following.
First, update page.tsx file in the app directory with the following code:
12345678910111213141516171819202122232425262728293031323334353637383940414243444546// File: app/page.tsx

'use client'

import { connect, DefaultGenerics, StreamClient } from 'getstream'
import { useEffect, useState } from 'react'

interface User {
  name: string
  photo: string
  handle: string
  client?: StreamClient<DefaultGenerics>
}

export default function () {
  const [user1, setUser1] = useState<User>({ name: 'Rishi Raj Jain', photo: 'https://github.com/rishi-raj-jain.png', handle: 'rrj' })
  const [user2, setUser2] = useState<User>({ name: 'Stefan', photo: 'https://github.com/DaemonLoki.png', handle: 'stf' })
  const getStreamClient = (userToken: string) => {
    if (process.env.NEXT_PUBLIC_STREAM_API_KEY) {
      return connect(process.env.NEXT_PUBLIC_STREAM_API_KEY, userToken, process.env.NEXT_PUBLIC_STREAM_APP_ID)
    }
  }
  useEffect(() => {
    const users = [user1, user2]
    users.forEach((i, idx) => {
      fetch(`/api/token?name=${i.handle}`)
        .then((res) => res.json())
        .then((res) => {
          if (res.userToken) {
            const userClient = getStreamClient(res.userToken)
            if (userClient) {
              if (idx === 0) setUser1({ ...user1, client: userClient })
              else setUser2({ ...user2, client: userClient })
              userClient.user(i.handle).getOrCreate({ name: i.name, photo: i.photo })
            }
          }
        })
    })
  }, [])
  return (
    <div className="flex flex-col gap-y-8 md:flex-row md:gap-x-8 md:gap-y-0">
       {/* Post an activity from a user */}
       {/* UI to display the user activities */}
    </div>
  )
}
The code above defines a User interface, which defines a client handler for each user object apart from their personal details. Further, the code defines a React component that instantiates two users, named rrj and stf. getStreamClient is then defined to dynamically obtain the client handler for any user. The useEffect hook is used to obtain the Stream tokens for all the users (rrj and stf), and update the client handler in their respective objects.
Now, add the following code to allow users to post activities:
12345678910111213141516171819202122232425262728293031323334353637383940414243444546474849'use client'
+ import { Button } from '@/components/ui/button'
+ import { Input } from '@/components/ui/input'
// Rest of the existing imports

// user interface declaration

export default function () {
  // state variables and useEffect hook definition
+  const [feedItems, setFeedItems] = useState<any[]>([])
  return (
    <div className="flex flex-col gap-y-8 md:flex-row md:gap-x-8 md:gap-y-0">
+       <div className="flex min-w-[300px] flex-col">
+         <span className="mb-3 font-semibold">Message</span>
+         <Input autoComplete="off" id="notification-message" placeholder="Notification Message" />
+         <Button
+           onClick={() => {
+             const message = document.getElementById('notification-message') as HTMLInputElement
+             if (user1.client) {
+               user1.client
+                 .feed('user', user1.handle)
+                 .addActivity({
+                   actor: `SU:${user1.handle}`,
+                   verb: 'tweet',
+                   tweet: message.value,
+                   object: 1,
+                 })
+                 .then(() => {
+                   const user2Client = user2.client?.feed('timeline', user2.handle)
+                   if (user2Client) {
+                     user2Client.follow('user', user1.handle).then(() => {
+                       user2Client.get({ limit: 1 }).then((feedResults) => {
+                         setFeedItems((clonedFeedItems: any[]) => [...feedResults.results, ...clonedFeedItems])
+                       })
+                     })
+                   }
+                 })
+             }
+           }}
+           variant="outline"
+           className="mt-3 max-w-max"
+         >
+           Send →
+         </Button>
+       </div>
      {/* UI to display the user activities */}
    </div>
  )
}
The code above defines a feedItems state variable as an empty array, which will, in the future, contain all the activity data from the following of a user. It also creates an input field for the user to input a message and attaches a callback to the Send button which does the following:
- Retrieves the message from the input field
- Uses user1's client to add an activity to their user feed
- Makes user2 follow user1's user feed
- Fetches the latest activity from user2's timeline feed
- Updates the
feedItemsstate with the new activity
This allows you to simply create a notification system where user2 sees activities posted by user1 in their feed.
Finally, add the following code to display the in-app notifications in the form of a timeline:
12345678910111213141516171819202122232425262728293031// File: app/page.tsx

'use client'

// Rest of the existing imports

// user interface declaration

export default function () {
  // rest of the state variables and useEffect hook definition
  return (
    <div className="flex flex-col gap-y-8 md:flex-row md:gap-x-8 md:gap-y-0">
       {/* Post an activity from a user */}
+       <div className="flex min-w-[300px] flex-col">
+         <span className="mb-3 font-semibold">Notifications</span>
+         {feedItems.map((i, _) => (
+           <div key={_} className="flex flex-col border border-l-0 border-r-0 py-3">
+             <img className="size-[40px] rounded-full" height="40px" width="40px" loading="lazy" src={i.actor.data.photo} alt={i.actor.data.name} />
+             <span className="mt-2">
+               <span className="font-semibold">
+                 {i.actor.data.name}({i.actor.id})
+               </span>{' '}
+               posted
+             </span>
+             <span className="mt-2 text-gray-600">{i.tweet}</span>
+           </div>
+         ))}
+       </div>
    </div>
  )
}
In the code above, using feedItems, a list is rendered that shows the name and ID of the user (from the following of the said user) who performed an activity with the respective content. Neat!
You are now done with building the reactive in-app notifications interface that displays all the recent activities of the following of a user. Let’s deploy the Next.js application to Vercel.
Deploy To Vercel
The code is now ready to deploy to Vercel. Use the following steps to deploy:
- Start by creating a GitHub repository containing your app’s code.
- Then, navigate to the Vercel Dashboard and create a New Project.
- Link the new project to the GitHub repository you just created.
- In Settings, update the Environment Variables to match those in your local .env file.
- Click Deploy.
Summary
In conclusion, this tutorial has provided a comprehensive guide on integrating Next.js and Stream to build an effective in-app notification system. By leveraging Stream's Activity Feeds and real-time capabilities, you have learned how to create a dynamic user experience that keeps users engaged and informed. The step-by-step approach covered everything from setting up a Stream application and configuring feed groups to implementing the notification interface in Next.js, including user token generation and activity posting.
More Information
For more detailed insights, explore the references cited in this post.